Mint chocolate chip ice cream was the flavor my mom always kept hidden at the very back of the freezer. It was “hers,” which meant I wanted it even more. I’d sneak a scoop, hoping the chocolate chips would cover my tracks.
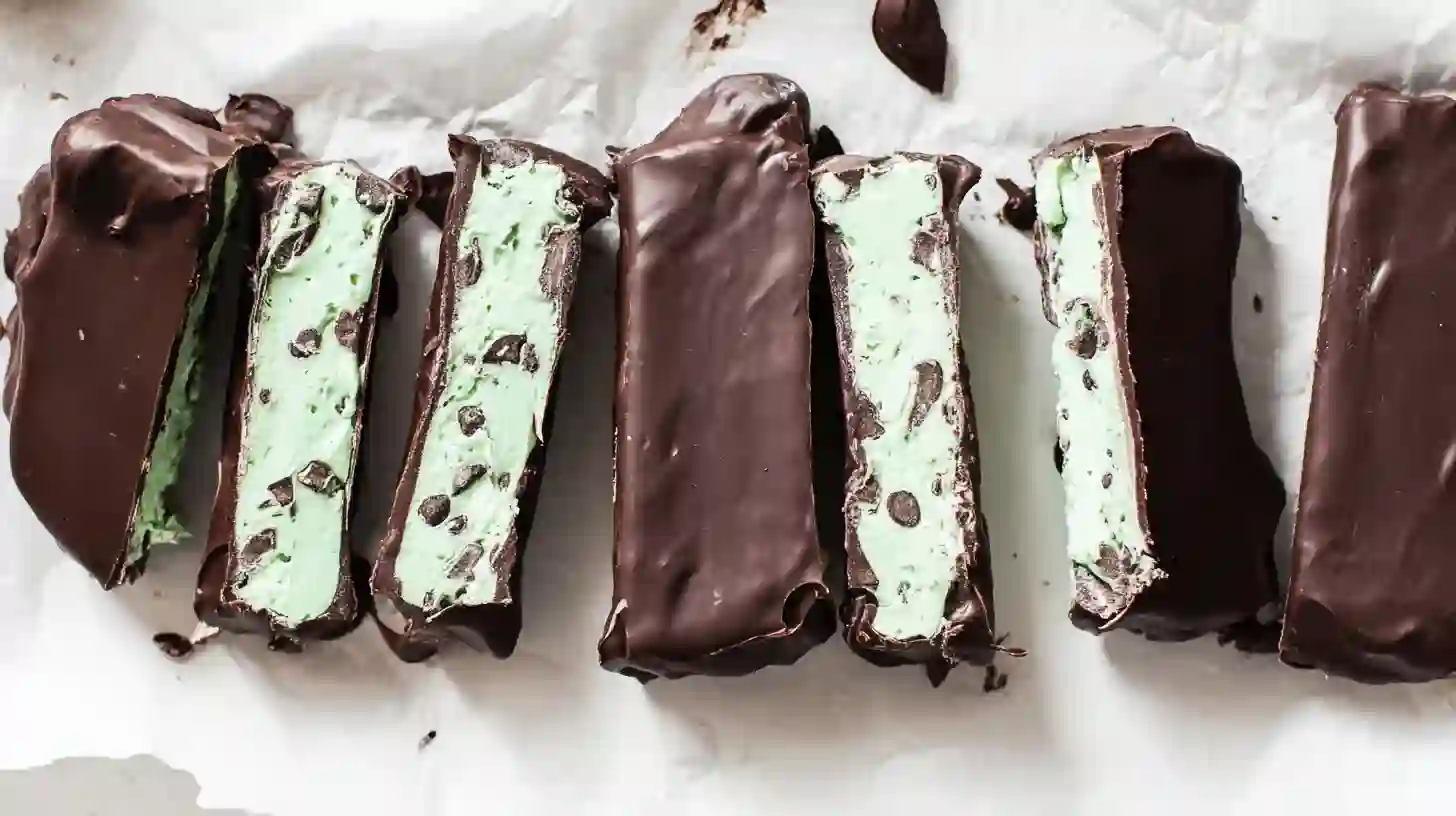
Now, I make these mint chocolate chip ice cream bars and keep them front and center—for everyone. They’re simple: just layers of melted dark chocolate, creamy mint ice cream, and a crisp topping. No baking, no molds—just a pan, a freezer, and a little layering.
They’re the kind of dessert that turns a hot afternoon into a small celebration. Quick to make, fun to slice, and cool enough to make the kitchen feel calm again.Mint Chocolate Chip Ice Cream Bars.
Table of Contents
Table of Contents
What Are Ice Cream Bars? (+ Full Recipe)
Ice cream bars are the frozen treat version of layered desserts—firm, sliceable, and easy to share. But when you make them yourself, they become more than just a snack. They’re personal. This version, made with mint chocolate chip ice cream, dark chocolate, and a hint of coconut oil, strikes that perfect balance of cool, crisp, and creamy.
Unlike molded pops, these bars are made in a simple rectangular pan. That means no fancy tools, just parchment paper and a freezer. Think of it as the relaxed cousin to our mint chocolate chip ice cream sandwiches—same flavor, new form.
Print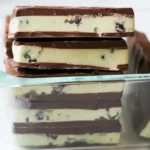
Mint Chocolate Chip Ice Cream Bars – Cool, Creamy & Homemade
- Prep Time: 10 minutes
- Cook Time: 0 minutes
- Total Time: 3 hours 10 minutes
- Yield: 6 servings 1x
- Category: Dessert
- Method: No-Bake
- Cuisine: Frozen Treats
- Diet: Vegetarian
Description
Mint chocolate chip ice cream bars are no-bake, chocolate-coated frozen desserts made with just a few simple ingredients. A cool summer favorite you can slice and serve straight from the freezer.
Ingredients
2 cups mint chocolate chip ice cream, softened
200g dark chocolate, chopped
2 tablespoons coconut oil
1/2 cup chocolate chips
1/2 cup crushed chocolate cookies (optional)
Instructions
1. Line a small rectangular pan with parchment paper, leaving some overhang for easy removal.
2. Melt half of the dark chocolate with 1 tablespoon of coconut oil until smooth. Pour it into the prepared pan and spread evenly. Sprinkle with half of the chocolate chips. Freeze for 10 minutes.
3. Spread the softened mint chocolate chip ice cream evenly over the hardened chocolate layer. Smooth it out with a spatula.
4. Melt the remaining dark chocolate with the rest of the coconut oil. Pour it over the ice cream layer and sprinkle the remaining chocolate chips on top.
5. Return the pan to the freezer and let it set for at least 3 hours or until firm.
6. Once fully set, remove from the pan using the parchment paper overhang and cut into bars.
7. Serve immediately or store in an airtight container in the freezer.
Notes
Use high-quality dark chocolate for the best snap and flavor.
For clean slices, run a knife under warm water between cuts.
Crushed chocolate cookies add a fun crunch, but they’re optional.
Nutrition
- Serving Size: 1 bar
- Calories: 250
- Sugar: 18g
- Sodium: 45mg
- Fat: 16g
- Saturated Fat: 10g
- Unsaturated Fat: 5g
- Trans Fat: 0g
- Carbohydrates: 24g
- Fiber: 3g
- Protein: 3g
- Cholesterol: 10mg
Keywords: mint chocolate chip ice cream bars, homemade ice cream bars, no bake dessert, chocolate dipped frozen bars
Ingredients about Mint Chocolate Chip Ice Cream Bars

- 2 cups mint chocolate chip ice cream, softened
- 200g dark chocolate, chopped
- 2 tablespoons coconut oil
- 1/2 cup chocolate chips
- 1/2 cup crushed chocolate cookies (optional)
Instructions Mint Chocolate Chip Ice Cream Bars
- Prepare the Pan: Line a small rectangular pan with parchment paper, leaving overhang for easy lifting later.
- Bottom Chocolate Layer: Melt half the dark chocolate with 1 tbsp coconut oil until smooth. Pour into pan and spread evenly. Sprinkle half the chocolate chips on top. Freeze 10 minutes.

- Add Ice Cream Layer: Spread softened mint chocolate chip ice cream over the hardened base layer. Use a spatula to smooth it flat.
- Top Chocolate Layer: Melt the remaining chocolate and coconut oil. Pour over the ice cream layer and sprinkle with remaining chips.
- Freeze to Set: Return the pan to the freezer for at least 3 hours, until fully firm.
- Slice & Serve: Use parchment overhang to lift out and slice into bars. Serve immediately or store frozen.
This treat is as satisfying to slice as it is to eat—and easier than baked desserts like our chilled high protein brownie batter.Mint Chocolate Chip Ice Cream Bars.
Customizing & Freezing Tips
One of the best things about these mint chocolate chip ice cream bars? You can make them yours. Whether you’re avoiding dairy or just feeling creative, the recipe easily flexes.
Flavor Swaps & Variations
Love texture? Add crushed chocolate cookies between the layers or sprinkle them on top. Want extra coolness? Try blending your own base using frozen bananas and a scoop of mint chocolate cookie protein powder—you’ll get flavor and a little protein boost.
For those who prefer a sweeter mint flavor, consider using our white mint chocolate chip ice cream as the base. It makes the chocolate coating pop and brings a creamier texture that cuts through the dark chocolate beautifully.
Freezing & Serving Tips

- Use a hot knife for clean cuts (dip it in warm water between slices)
- Store in an airtight container to prevent freezer burn
- Let the bars sit at room temperature for 2 minutes before serving to soften the chocolate shell slightly
Making these ahead of time means you’re always just a slice away from a cold, refreshing treat. And if your freezer’s already stocked with apple mint ice cream, you’ve got options for days.
Benefits Mint Chocolate Chip Ice Cream Bars
These mint chocolate chip ice cream bars aren’t just cool and creamy—they’re practical. You don’t need an ice cream maker or special molds. You just layer, freeze, and slice. They look impressive but take less than 15 minutes of hands-on time.
They’re perfect for hosting, prepping ahead, or just having something refreshing waiting in the freezer. And like many of our recipes, they hit that balance between fun and functional—just like our smooth, protein-rich apple mint ice cream.
Did you make this recipe? Tag @StuffaniBorjat on follow me in pinterest and twitter and Facebook
FAQs about Mint Chocolate Chip Ice Cream Bars
Can I make ice cream bars without a mold?
Yes! This recipe uses a simple parchment-lined baking pan. The layers freeze flat and slice easily—no need for molds or sticks.
What chocolate is best for coating ice cream?
Use high-quality dark chocolate with a tablespoon of coconut oil. The oil helps it harden quickly and smoothly, creating a snappy shell that cracks beautifully when you bite in.
How long do homemade ice cream bars last?
They keep well in an airtight container in the freezer for up to 2 weeks. For best texture, let them sit for 1–2 minutes at room temperature before serving.
Can you make dairy-free mint chocolate chip bars?
Absolutely. Use a dairy-free ice cream base like oat or coconut milk ice cream. Most dark chocolate is naturally dairy-free, but check the label to be sure.
Conclusion about Mint Chocolate Chip Ice Cream Bars
These mint chocolate chip ice cream bars prove that dessert doesn’t have to be complicated to be memorable.
They’re the kind of treat you can keep in your freezer and reach for on a whim—something cool, crunchy, and nostalgic all at once. No molds, no mixers—just layers of good ingredients and a little bit of love.
So the next time you need a make-ahead dessert that feels a little special, start here. Because sometimes the simplest things are the ones that stick.